The Pacific Northwest is known for its breathtaking landscapes, evergreen forests, and steady rainfall. While the region’s climate creates a beautiful environment, it also presents unique challenges for homeowners—especially when it comes to residential roofing. If you live in Washington, Oregon, or nearby coastal areas, you may be wondering how long your roof is expected to last and what factors influence its lifespan.
Understanding the durability of different materials, the impact of weather patterns, and proper maintenance practices can help you protect your investment and avoid premature roof replacement. This guide explores the average lifespan of roofs in the Pacific Northwest and what homeowners should know about maintaining long-lasting residential roofing systems.
The Climate Factor: Why the Pacific Northwest Is Unique
The Pacific Northwest experiences prolonged periods of rain, high humidity, moss growth, and occasional windstorms. Unlike regions with extreme heat or heavy snow accumulation, the primary concern here is persistent moisture.
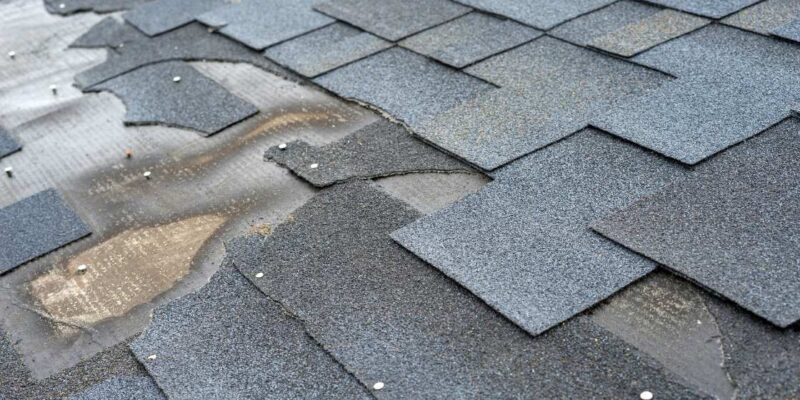
Moisture exposure affects residential roofing materials over time by weakening shingles, promoting mold or moss growth, and accelerating wear. While most roofing systems are designed to withstand weather elements, constant dampness can reduce their lifespan if not properly maintained.
Additionally, coastal areas may experience salt exposure and stronger winds, which can further impact roofing durability. Understanding your local microclimate plays an important role in predicting how long your roof will last.
Average Lifespan of Common Roofing Materials
The lifespan of residential roofing largely depends on the type of material installed. In the Pacific Northwest, certain materials perform better than others due to moisture resistance and durability.
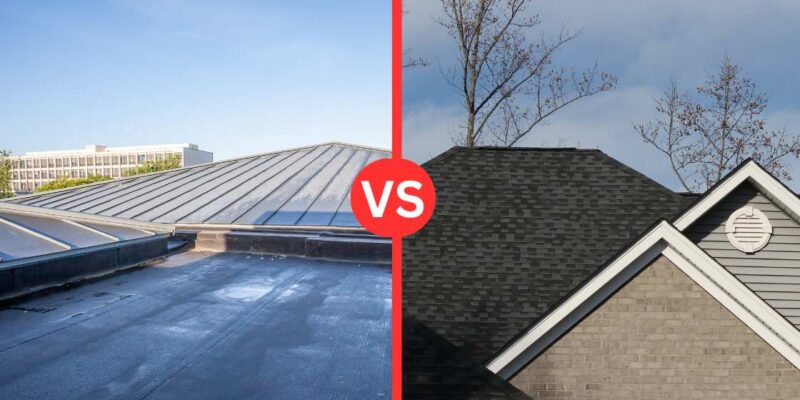
Asphalt shingles, one of the most common roofing materials, typically last between 20 to 30 years under normal conditions. However, in wetter climates, poor ventilation or inadequate maintenance may shorten this timeframe. Architectural or laminated asphalt shingles generally offer greater durability and may last closer to 30 years.
Metal roofing has become increasingly popular in the region due to its moisture resistance and longevity. A properly installed metal roof can last 40 to 70 years, making it one of the most durable residential roofing options available.
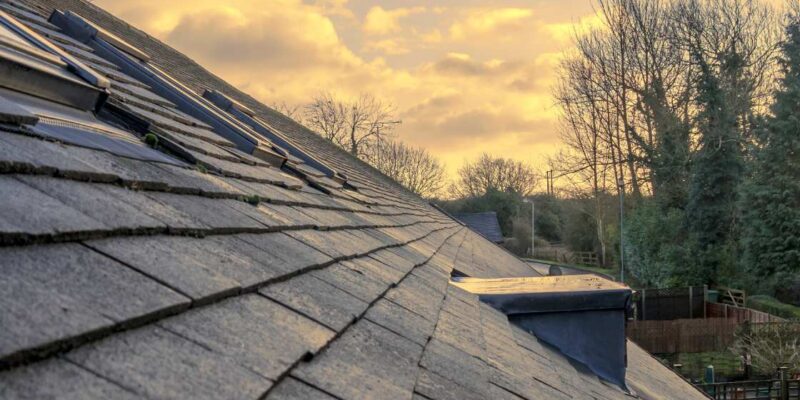
Cedar shake roofing, which complements the natural aesthetic of the Pacific Northwest, usually lasts 20 to 40 years. However, cedar requires consistent maintenance to prevent moss, rot, and moisture damage.
Tile and slate roofing systems are less common in the region but can last 50 years or more when properly installed and maintained. Their weight and cost, however, may not be suitable for every home.
The Role of Installation Quality
Even the highest-quality materials can fail prematurely if not installed correctly. Professional installation is critical for maximizing the lifespan of residential roofing in the Pacific Northwest.
Proper flashing, underlayment selection, ventilation systems, and water barriers all contribute to roof durability. In a region with heavy rainfall, water must be effectively directed away from vulnerable areas such as valleys, chimneys, and skylights.
Hiring experienced roofing contractors who understand local climate demands ensures that your residential roofing system is built to withstand persistent moisture and seasonal weather changes.
Maintenance and Inspection: Extending Roof Lifespan
Routine maintenance plays a significant role in how long a roof lasts. In the Pacific Northwest, moss and algae growth are common issues due to damp conditions and shaded roof areas.
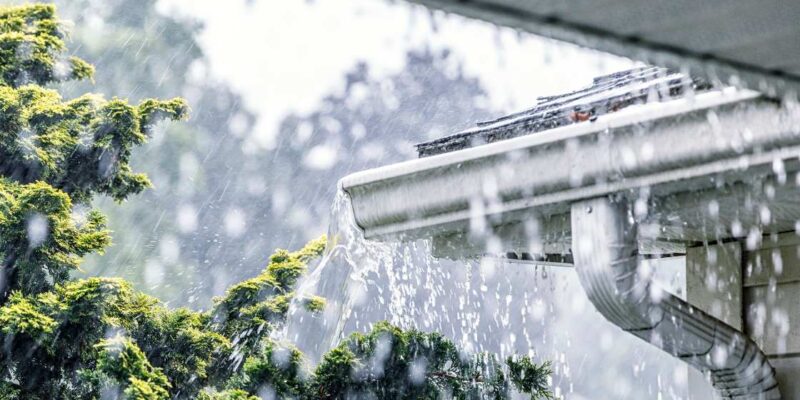
Regular cleaning and moss removal prevent moisture from being trapped against shingles. Blocked gutters should also be cleared frequently, as standing water can seep under roofing materials and cause damage.
Annual professional inspections allow homeowners to identify minor issues before they become costly repairs. Small leaks, damaged shingles, or loose flashing can be addressed early, significantly extending the life of residential roofing systems.
Ventilation and Moisture Control
Proper attic ventilation is often overlooked but is essential for roof longevity. In humid climates, poor ventilation can lead to condensation buildup beneath roofing materials.
Excess moisture trapped in the attic can weaken wood decking, encourage mold growth, and reduce insulation effectiveness. A well-designed ventilation system regulates temperature and humidity, helping preserve the structural integrity of residential roofing components.
Homeowners should ensure that ridge vents, soffit vents, and attic insulation are functioning properly to support long-term roof performance.
Signs Your Roof May Be Nearing the End of Its Life
While material lifespan provides a general estimate, visible warning signs often indicate when residential roofing needs attention. Curling or cracked shingles, missing granules, persistent leaks, sagging rooflines, and excessive moss growth are all indicators of aging.
Water stains on ceilings or walls may signal hidden roof damage. Additionally, if your roof is approaching the upper end of its expected lifespan, it may be more cost-effective to plan for replacement rather than repeated repairs.
Regular evaluation helps homeowners prepare financially and avoid emergency replacements during severe weather.
The Impact of Storms and Wind
Although the Pacific Northwest does not frequently experience hurricanes, windstorms and heavy rain events can accelerate wear on residential roofing systems. Strong gusts may lift shingles or damage flashing, while intense rainfall can exploit weak spots in the roof structure.
After significant weather events, it is wise to inspect your roof or schedule a professional evaluation. Addressing minor storm damage quickly prevents larger structural issues.
Energy Efficiency and Roofing Longevity
Energy-efficient roofing systems can contribute to both durability and cost savings. Reflective materials, proper insulation, and ventilation reduce temperature fluctuations that may stress roofing materials over time.
Some modern residential roofing systems incorporate moisture-resistant underlayments and advanced sealing technologies that enhance long-term performance. Investing in high-quality materials may increase upfront costs but often results in extended lifespan and lower maintenance expenses.
When to Consider Roof Replacement
Most homeowners in the Pacific Northwest can expect asphalt residential roofing systems to last approximately 20 to 30 years, metal systems up to 70 years, and cedar shakes up to 40 years with diligent maintenance.
If your roof consistently requires repairs, shows widespread deterioration, or exceeds its expected lifespan, replacement may be the safest option. Modern roofing systems offer improved durability, better water resistance, and enhanced energy efficiency compared to older installations.
Planning ahead allows homeowners to choose materials that align with both climate conditions and long-term financial goals.
The lifespan of residential roofing in the Pacific Northwest depends on several key factors, including material selection, installation quality, maintenance practices, and climate exposure. While persistent moisture and seasonal storms can reduce longevity, proactive care and professional inspections significantly extend a roof’s lifespan.
By understanding how different materials perform in wet climates and investing in proper maintenance, homeowners can protect their property and ensure their residential roofing system remains strong and reliable for decades. In a region defined by rain and natural beauty, a well-maintained roof is one of the most important defenses against the elements.
With these factors in mind, and help from a professional roofing company like MBA Construction Corp, you’ll be able to create a beautiful and cohesive look that will last for years. For over 15 years, MBA Construction Corp has been the trusted professional roofing company in the Seattle and Puget Sound area, contact MBA Construction today to get started! Or call 206-753-9563.